As a sports photographer, it is super important that my sports photography workflow for during and after games is on point. If I’m slow transmitting photos up to the teams, the leagues or wherever then the chances of my photos being picked up dramatically decreases. The whole point of my sports photography workflow is to get my photos off my camera and uploaded in the shortest amount of time possible.
What also dictates my sports photography workflow is what sport I’m shooting. If I’m shooting for the NFL, then I know I have multiple opportunities to upload during the day. I can upload after warmups, at halftime and after the post game handshakes. Those are just some of the times, but I usually upload photos 4 or 5 times during a game and that is not including my post game upload of all my favorite images.
When I shoot for MLB, I don’t have many chances to upload as I do when I’m working for the NFL. And since there are no real breaks except for the 90 seconds between innings, all my uploading is done in real time. Like my NFL workflow, at the end of the game I do a bulk upload of all my favorite images.
I use Photo Mechanic for the majority of what I need to for my sports photography workflow. I use it to import my photos, add all the required metadata as well as tag them and bag them for uploading. It is the one vital piece of software I need as a sports photographer.
Since the majority of the photos I shoot are down in .jpg and I have to nail it in camera, I rarely and I mean rarely use Adobe Lightroom or Adobe Photoshop on game days. Since my camera has dual slots for memory cards, I use one card for RAW files and the other for .jpg files. Now when editing RAW files I do use Lightroom and Photoshop, but rarely do I get asked to upload a RAW file to the league. It’s strictly .jpg files.
Photo Mechanic
Live Ingest
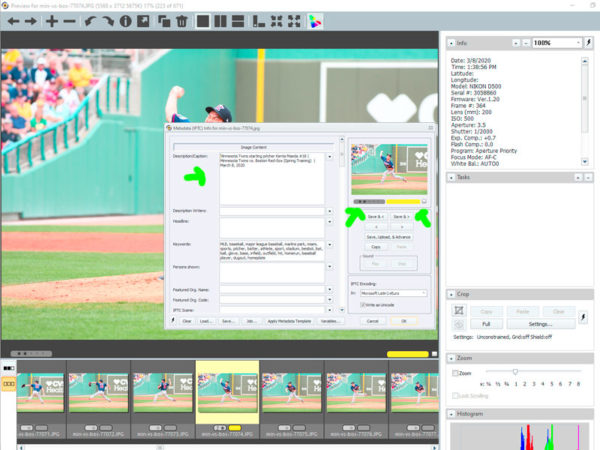
For years I would always use Adobe Lightroom to import my photos and if you ever used Lightroom for that purpose you know how horrible it is. Slow and painful are the two best adjectives that would describe the import functionality in Lightroom. With Photo Mechanic that ingest (import) functionality is amazing. It imports super quick and as photos are loading into the library I can delete the ones I don’t need, I can update metadata in others all while it ingests photos from my memory card.
Prior to ingesting, I add keywords, a generic caption and I update metadata information. For the generic caption I usually add the teams that were playing, the location and the date of the game. This way when I import my photos, every photo has the exact same information to start off with.
Tag Them & Bag Them

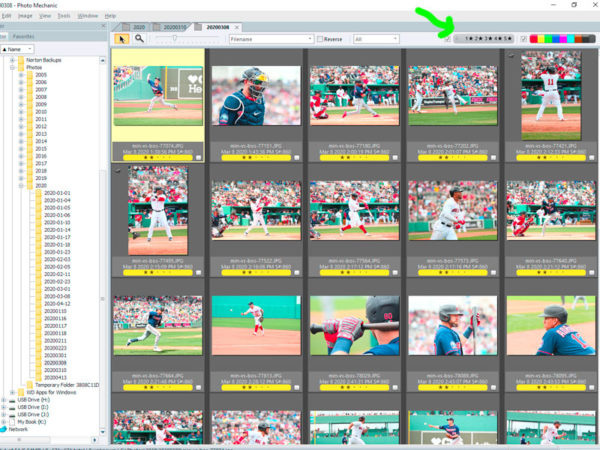
After I import everything, now it’s time for me to select the photos I want to upload. Something I refer to as tagging and bagging them. There are multiple ways you can tag them. You can either rate them by a 5 star system or you can color code them. And there are some people like the legendary Peter Read Miller who just hits the “t” key on a photo to tag them. It is what ever works the best for you. If you want to see how Peter Read Miller selects photos, subscribe to his YouTube page. It’s worth it.
When I’m updating captions on the photos I tagged I use some thing called Code Replacements to help with my captions. It’s this great tool that works with Photo Mechanic to help speed up writing captions. Prior to a game I go to Code Replacements, input the teams playing and it then generates rosters for me of those teams. I can set it up to add player numbers or positions with their name etc. It’s truly a god send if there ever was one for photographers. All I have to do in the caption section is write something like “\ne12\” and Photo Mechanic takes that any writes in #12 Tom Brady, Quarterback New England Patriots. And when it comes to deadlines you need every advantage you can get. Code Replacements with Photo Mechanic is a huge advantage that really can’t be ignored.
Selection and Transfer to Lightroom
After I’ve tagged and bagged them I toggle the photos by clicking on either the star or code rating in the main window so I can only see the photos I’ve tagged. I do a quick glance to make sure I really want to upload these and then I let them fly.
Now if I’m editing the RAW files I will open up the Library view in Lightroom and just select all the images I wanted to edit in Photo Mechanic and just drag them to Lightroom and Lightroom will only import those photos.
Adobe Lightroom
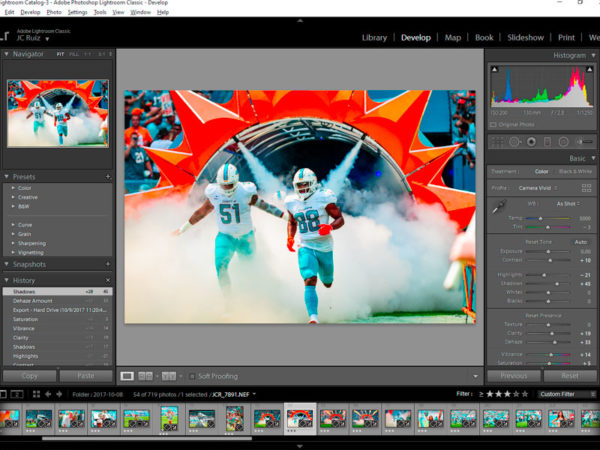
There are other photo editors out there and all have their pros and cons, but I’ve been using Adobe Lightroom since it first came out and that my photo editing tool of choice. Since these photos are for me I can get creative with how they look. I can play with a multitude of sliders to get different looks and feels for the photos. I live bright, vibrant colors with dark shadows and with a few movements of certain sliders, I get the look I want.
I don’t go crazy editing photos. I have presets I use over and over to get me started and then I tweak here and there. I’m not into buying presets or actions for Lightroom or Photoshop. I make my own. One it saves me money and two the presets or actions I use are for the look and feel of my photos. I don’t believe a portfolio should have hundreds of different looks and feels for photos. I think there should be a common theme or feel and that is my belief. Am I right? For what works for me yes, but for others they may feel different and that is ok.
Adobe Photoshop
I rarely use Photoshop for my photos. The majority of my work is done in Photo Mechanic and Lightroom. What I use Photoshop for is creating my Instagram posts and stories. If I directly post to Instagram I don’t have a lot of room to present the photo the way I truly want to if that makes any sense. I’m only allowed 1080 by 1080 in Instagram and when I use Photoshop to make my posts, I have complete control of the 1080 by 1080 pixels Instagram gives us. And as a photographer, I want that complete control over my photos. I want to give people the chance to see a photo as how I truly intended it to be seen on social medai.
So that is my sports photography workflow. As you can see I use just a few tools for my editing process. And this sports photography workflow works for me. You have to find what works for you.
I’d love to hear what your thoughts are on your sports photography workflow. Leave a comment below or you can email me at jc@jcruizphotography.com