After photographing the sunset over the Everglades this past weekend using HDR, I thought I would share my HDR process. HDR stands for high dynamic range and what it is basically is you take multiple photographs, one for the highlights, one for the shadows and a regular exposure, and then you combine them all into one photograph and have detail representation for both highlights and shadow details. HDR photography has gained popularity in the past few years and I primarily use HDR when I’m photographing sunrises and sunsets.
Some people use a 3 bracketed shot method where you take a normal exposure and one for the shadows and highlights for their HDR process. I use a 5 bracketed shot method. I prefer to have more detail showing up in my HDR photos. I go one and two stops overexposure then I do the same for underexposure. I know some people use a high burst of the shutter to take all their photos instantly but I prefer using a tripod when using HDR in my photography. The tripod’s benefit is that I will have the same consistent photograph for each exposure. Hand held I run the risk of moving the camera and then all photographs won’t line up perfectly when I create my HDR photograph and it leads to weird blurring which doesn’t make for a great HDR image.
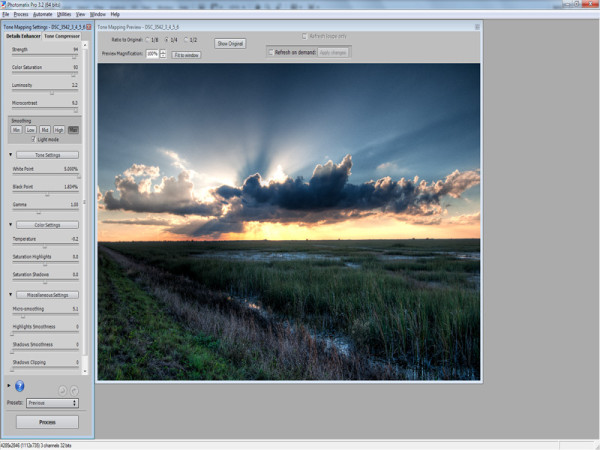
You can use Adobe Photoshop to merge and create HDR photos but I prefer Photomatix by HDRsoft. Once Photomatix opens up I click on the “Generate HDR Image” button and then select the photographs I want to merge. Another popup box will appear will some additional items such as check boxes for options to align images and to help reduce “ghosting” and I have those both clicked. There are other options such as reducing noise, but I address that step later on in my process. Once you click OK, a rough draft image will appear. To add the finishing touches click on the “Tone Mapping” button.
The Tone Mapping portion is a very critical step to me. Here I have sliders such as Luminosity, Micro Contrast and Smoothing, just to name a few, that help bring out and enhance details. I don’t use every slider, I focus on a key few. The strength slider is used to affect the degree to which contrast and detail are displayed or enhanced. I keep my strength slider in the mid to upper 90’s. I like a lot of detail and this helps bring them out more. The next slider I use is the color saturation slider. It’s pretty straight forward, that slider affects the amount of saturation in the image. I prefer to keep this slider in the 90’s as well as I like bold and vibrant colors. The luminosity slider I use to boost shadow detail and also to brighten the image up a bit more. I use the micro contrast slider to darken the image which used in conjunction with the luminosity slider I balance out the image the best I can.
The final slider I primarily use, and the most important, is the smoothing slider. I say this is the most important slider because this slider determines if you want your HDR image to look fake with halos in the photograph or if you want your photograph to look like it more realistic. I’ve seen some very great HDR photographs and I’ve seen some horrendous ones and I can tell which setting the smoothing slider was on. I push my slider all the way to the max and I keep it there. I abhor the thought of halos in my photographs and basically I’m not a fan of fake looking images. Some people like it, but I’m not one of them.
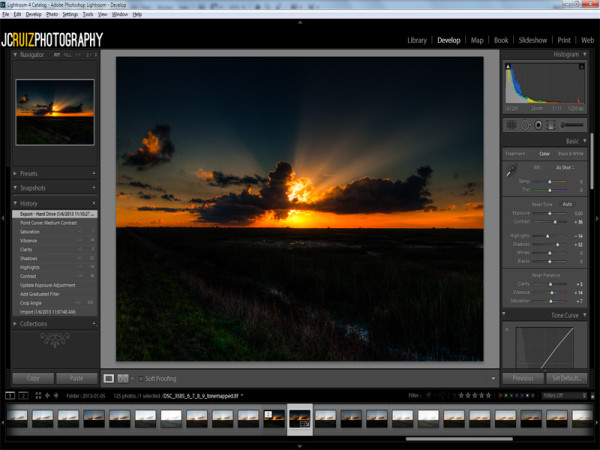
After I save my photograph in Photomatix, I import it into Adobe Lightroom where I make some more enhancements to the image. I always add a bit more contrast with a touch of clarity to the photograph. I also use the local adjustment brushes and fix things as dust spots or remove a stray bird etc. What I use the most is the graduated filter option. With the graduated filter I can darken the sky but leave the ground untouched.
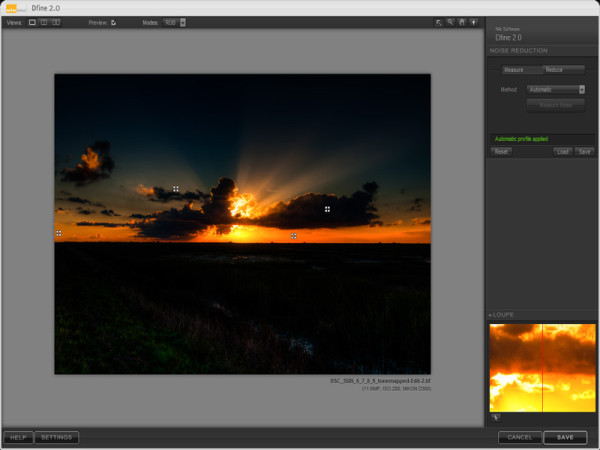
While in Lightroom I do my noise reduction. Although Lightroom has their own built in noise reduction method, I prefer using Dfine by Nik Software. I use a lot of Nik Software plugins with my Lightroom editing and Dfine is used on every image. I just love the way it reduces noise while keep color and details in the photographs. Some noise reduction blurs the pixels to the point where the colors look a bit muddy to me.
Once I’m done with all the Lightroom editing I export my photograph over into Photoshop where I do my sharpening. I may use the clone stamp or healing brush tool for fixes that Lightroom couldn’t handle but those situations are few and far between. Photoshop is the last stop on my HDR processing journey. Once I’m done, the photograph is ready for the world to see.
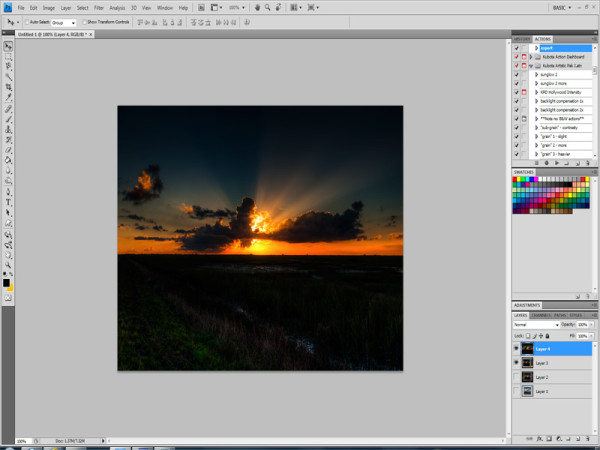
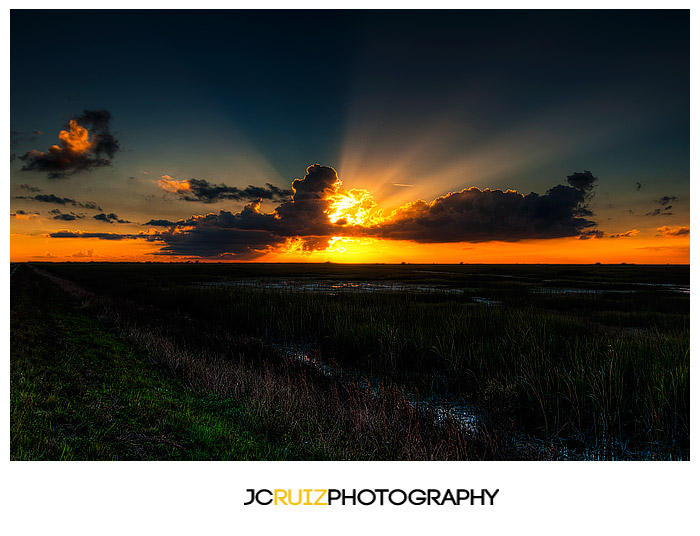
The final product: