I’ve received a couple of questions about my digital workflow as to it pertains to me touching up images; so I thought I show you how I go about touching up or editing my photos. I use Adobe Lightroom 3.0 as my main image editor. I also use plugins with Lightroom specifically the Nik Software Suite. After I achieve the look I desire for the image I then bring the photo over into Adobe Photoshop where I add some last minute touches and use the Kubota Image Tools actions to put the finishing touches on my image. I also use BlogStomp to give my images that white border I use for all the images on my blog.
Below is a step by step process I use for my photos. I have included photos so you can see the process as it progresses.

Here is an image from the Camille portrait photo shoot last week. As you can see it’s slightly underexposed and some of the background highlights are blown out. I would normally would try to nail the exposure during the shoot so I wouldn’t have to mess with it in Lightroom but I’m using this photo as an example.
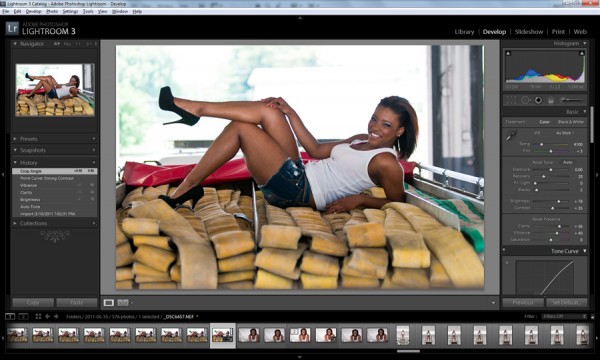
Once in Lightroom I bump the exposure up a bit. I also slide the Recovery slider over to get some of the detail back that was lost in the blown highlights. Since in this photo I’m not too concerned about the blown out background. I also use the Clarity and Vibrance sliders to add a little more pop to the photo. I don’t use the Contrast slider to give contrast to my photos but instead I use the Curves dialog box and I always opt for Strong Contrast. I use to use the Contrast slider, but that changed once I saw a tip from Scott Kelby and he explained his reasoning for not using the Contrasts slider. As you can already see a big difference already in my photo.
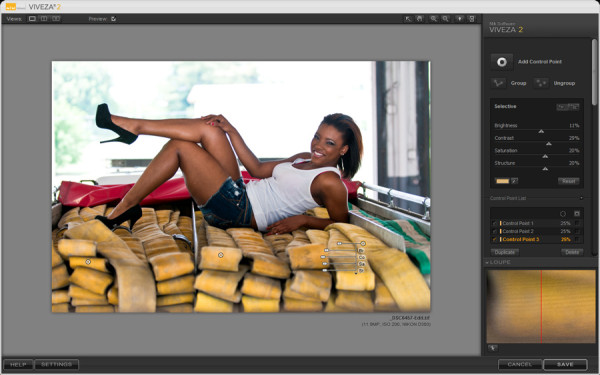
With this photo I wanted to add a bit more contrast and color to the hoses so I would use the Viveza plugin from Nik Software to do that. In all Nik Software products they have this technology called the U Point technology and what that does is allow me to pinpoint my edits to a certain part of the photo or a certain color etc. Viveza is primarily used by me to target certain colors in the image that I either want to pop or dull down a bit. For the hoses, I added some more contrast, brightened the colors and boosted saturation a tad.
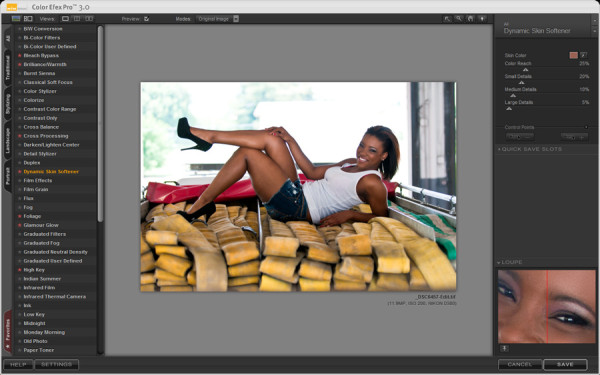
The next plugin from the Nik Software suite I would use is the Color Efex Pro plugin. Color Efex Pro has these filters I use to achieve certain looks for my photos. The have cross processing filters, high key filters, glamour glow filters etc. For this photo I use the Dynamic Skin Softener filter. I prefer using this filter instead of trying to fix it in Photoshop. With this filter I have complete control of her skin. I basically taking an eye dropper tool and select the skin tone I want to soften. I’m not a huge fan of the fake, plastic looking skin so I move the sliders within this plugin to achieve the look I want. In this photo I kept the default settings so it looks a bit plastic looking.
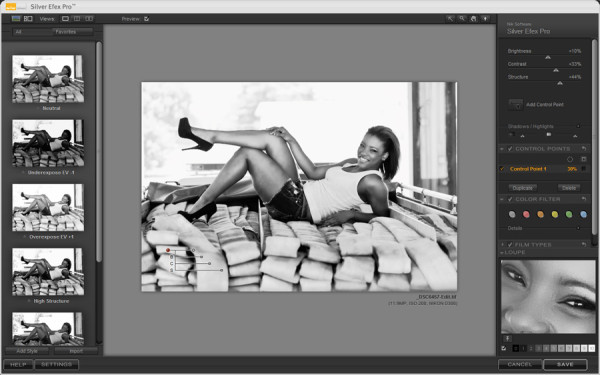
If I wanted to, this would be the time I would use Nik Software’s Silver Efex Pro to convert my photo into a black and white photo. Like Color Efex Pro, Silver Efex Pro also has some built in filters for you to use. I prefer to make the edits in Silver Efex Pro myself. I use Silver Efex Pro for all my black and white conversions. It also allows me to add certain colored tints as well as add some vignetting to the photo. I personally enjoy a lot of shadows and pure blacks in my black and white photos. I always try to be dramatic when I convert my photos for black and white.
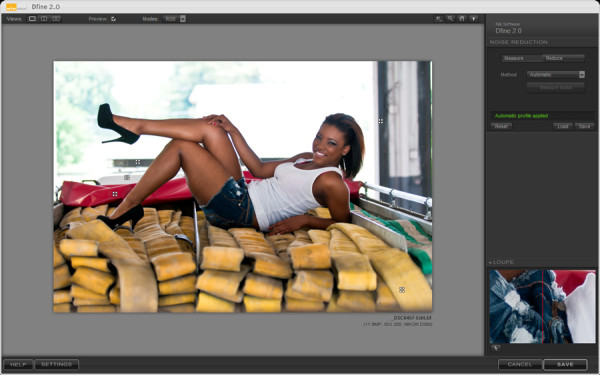
My last step before exporting my image over to Photoshop is to run it through Nik Software’s noise reduction plugin called Dfine. The best think about this plugin is that it scans the photo and looks for noise and reduces it or smooths it out. I don’t have to change anything etc. because Dfine does it automatically. If I wanted to manually select portions of the photo to have the noise reduced I could but I find the automatic search by Dfine to do a great job all by itself.
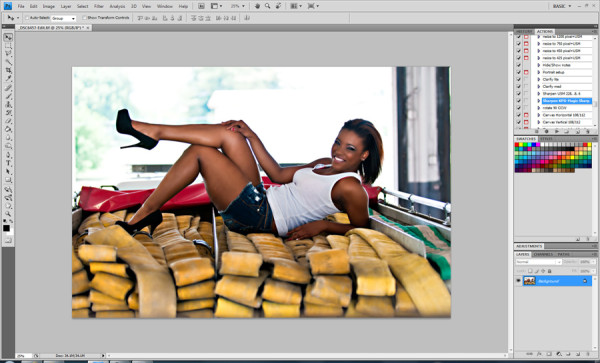
Once in Photoshop I add the finishing touches. I prefer Photoshop’s clone tool to remove spots and other artifacts to be far superior than what is in Lightroom. I also use Kubota actions to spice up the photo a bit more. I don’t go too crazy with actions, but I do have my favorites that I use quite often. The one action that I use is called Magic Sharp. Magic Sharp sharpens up the image. The results after using Magic Sharp are amazing. It brings out details in the photo in such an amazing way. Sometimes though, depending on the image, Magic Sharp will be too sharp and add noise to the photo. To counter act that I create a new layer and apply the Magic Sharp to that and reduce the opacity. I learned that trick from Jasmine Star after I sent her a message on Twitter and she replied back with her work around solution. Twitter never ceases to amaze me.
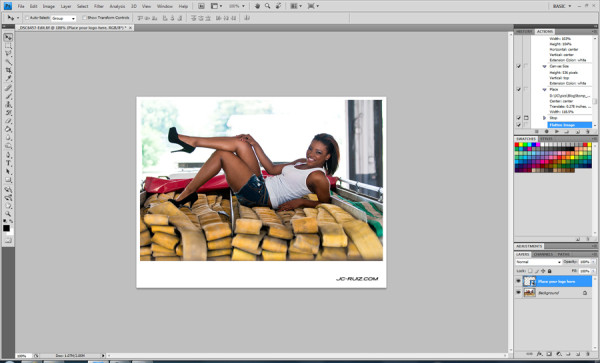
If I want to use this image in my blog I use the BlogStomp action to basically add a white border around my image and it also allows me to use a logo. I found out about BlogStomp from an FAQ Jasmine Star posted on her blog. I recommend checking out her site and blog. She is a phenomenal photographer and she also loves to share her knowledge which I commend. BlogStomp has a few different types of actions to download from but I opted for the white border action. Inside this action are folders based on different sizes you want the image to be resized to. It also has the ability to have both vertical and horizontal images stand alone or combine either two vertical or two horizontal images together. I prefer to keep my horizontal image separate while I find myself combining two vertical images into one.

Here is the finished product. I try not to go overboard when I edit my photos. I prefer to add some contrast, add a little pop to the colors as well as sharpen them to my liking. I use all the tools mentioned above to make the final product. Sometimes I just use Lightroom and Photoshop with no plugins and other times I use my entire arsenal. I usually have an idea how I want the image to look and I use these tools to achieve that look. It can be time consuming sometimes but it’s well worth it in the end.
Everyone’s digital workflow varies on their preference and what they like to photograph.